· 2 min read
How to start and stop an EC2 instance on a schedule
Learn how to easily start and stop your EC2 instance on a schedule in a few minutes without writing any code.

Here’s a simple three-step guide on how to start and stop your EC2 instances on a schedule using SnoozeMyCloud.
Connect to your AWS account
To be able to start and stop your EC2 instances, we need to connect to your AWS account. The standard way to do this is by creating an AWS Access Key and Secret Key.
Our Connect to AWS Account form provides you with a step-by-step guide on how to create these keys. Also please make sure to only attach the permissions, that we actually need, to the user you create.
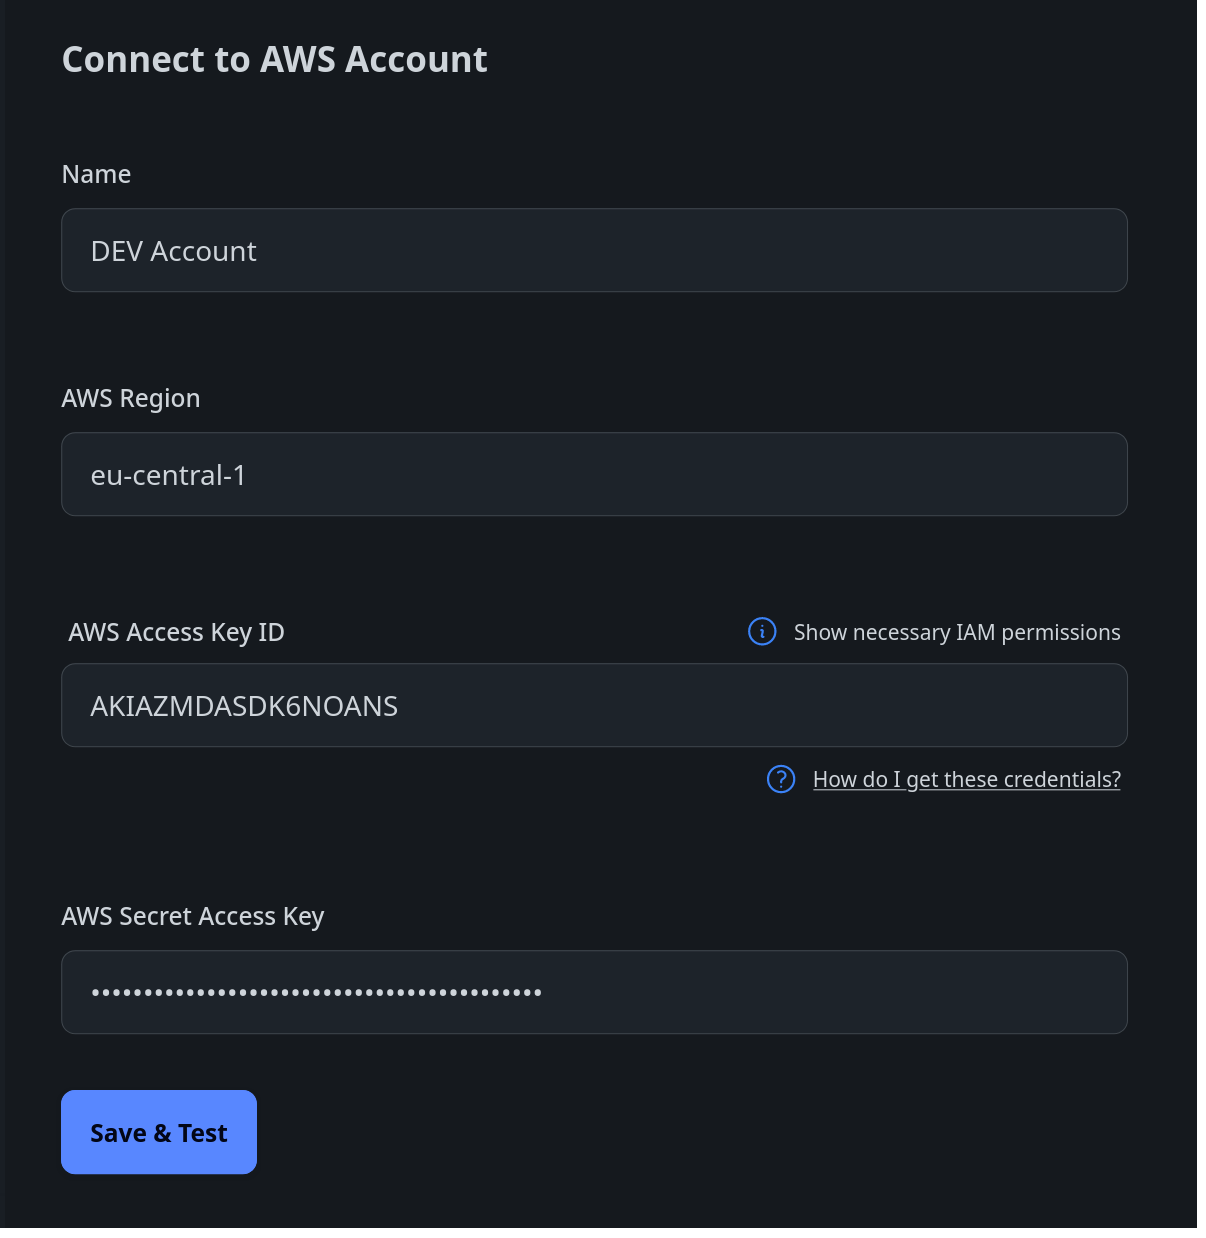
After successfully linking your AWS account, we sync all of your EC2 instances in the background. These can later be assigned to a schedule. So let’s create one first.
Create a schedule
At SnoozeMyCloud, we use the concept of a “bedroom”. Each bedroom has a schedule that defines when the EC2 instances assigned to it should start and stop. Each instance can only be assigned to one bedroom at a time, but every bedroom can have multiple instances assigned to it.
To create a new one, click on the Create Bedroom button on the bedroom overview page.
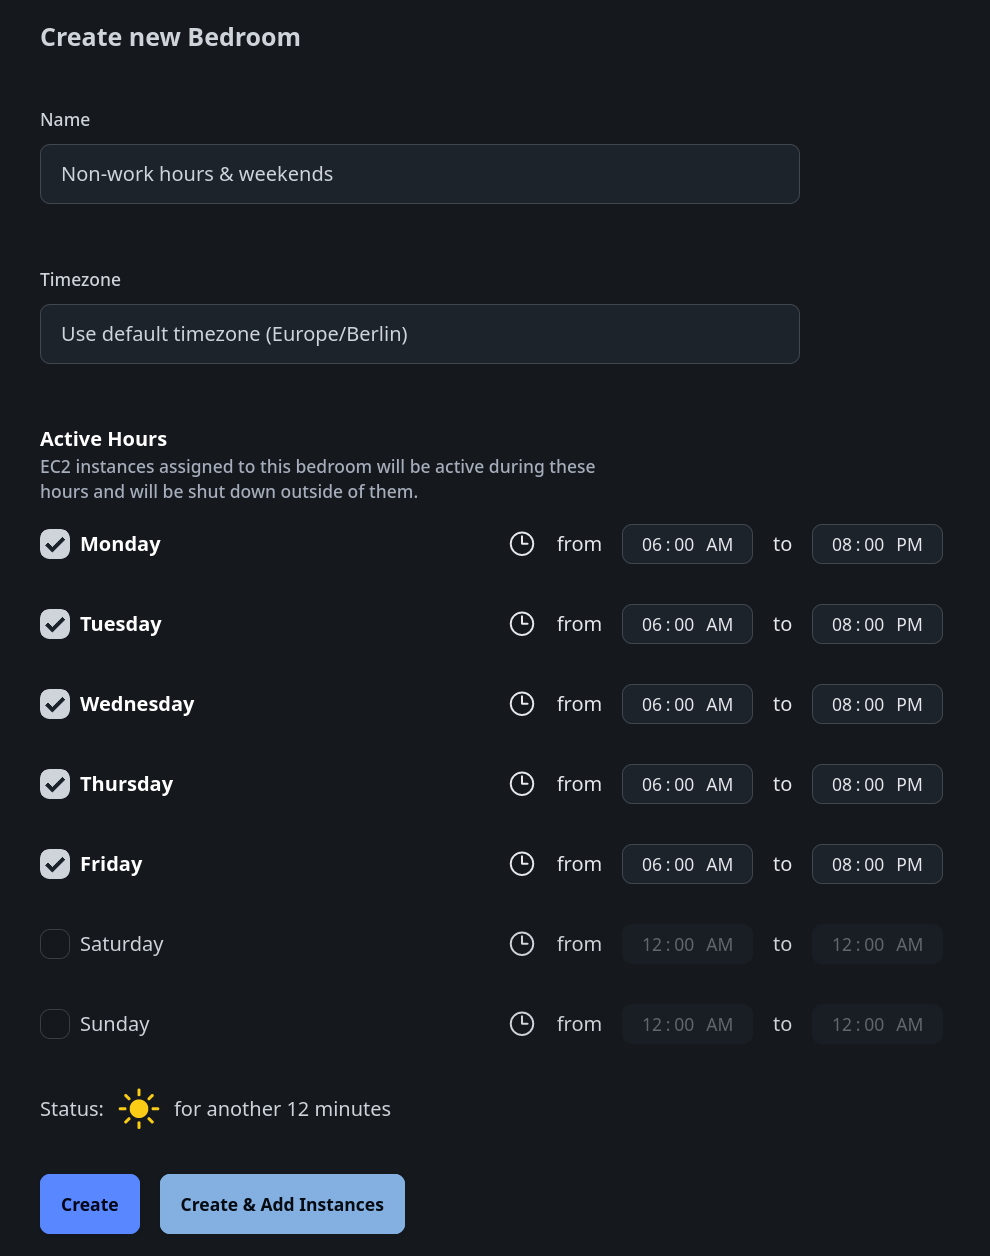
After setting a name and schedule, you can start assigning your EC2 instances.
Assign the EC2 instance to the bedroom
To do that, click on the Instances button of your newly created bedroom, that can be found on the bedroom overview page.
Select the instance(s) you want to assign and do just that.
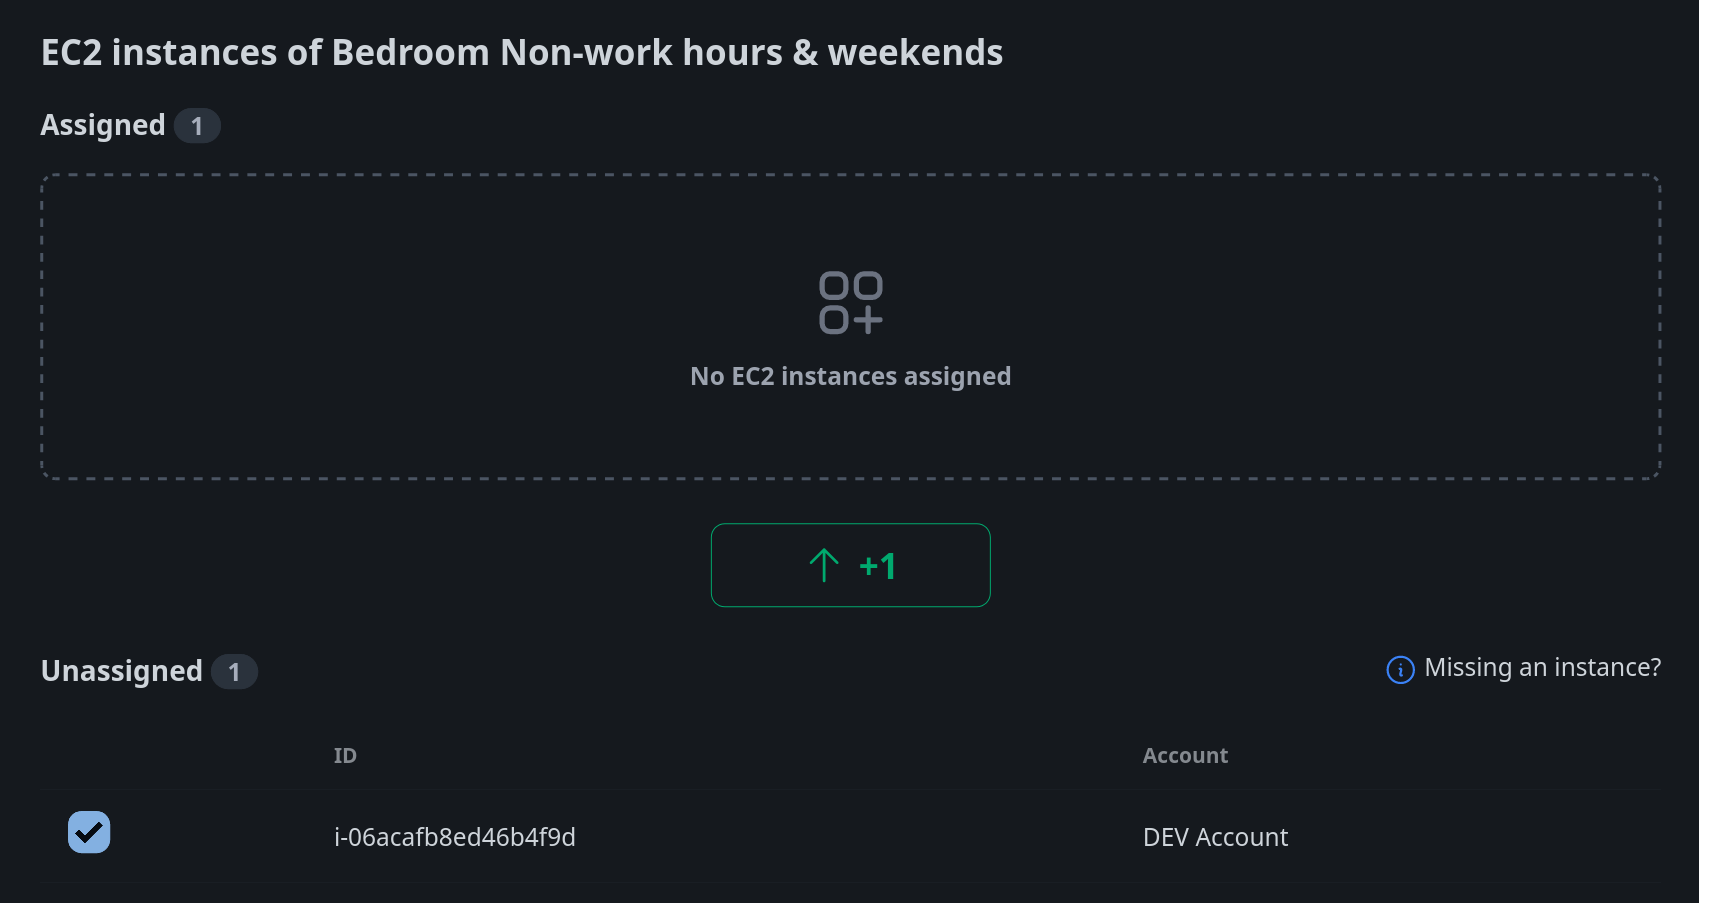
And that’s all it takes! Your assigned EC2 instances will now start and stop according to the schedule you’ve set.
If you have any questions or need help, feel free to reach out to us using our contact form that you can find in the sidebar.
Happy scheduling!